Pay Online
How to Make White Chocolate Cheesecake at Home (No Cracks, Ultra Creamy!) How to Make White Chocolate Cheesecake at Home (No Cracks, Ultra Creamy!)

How to Make White Chocolate Cheesecake at Home (No Cracks, Ultra Creamy!)

Introduction

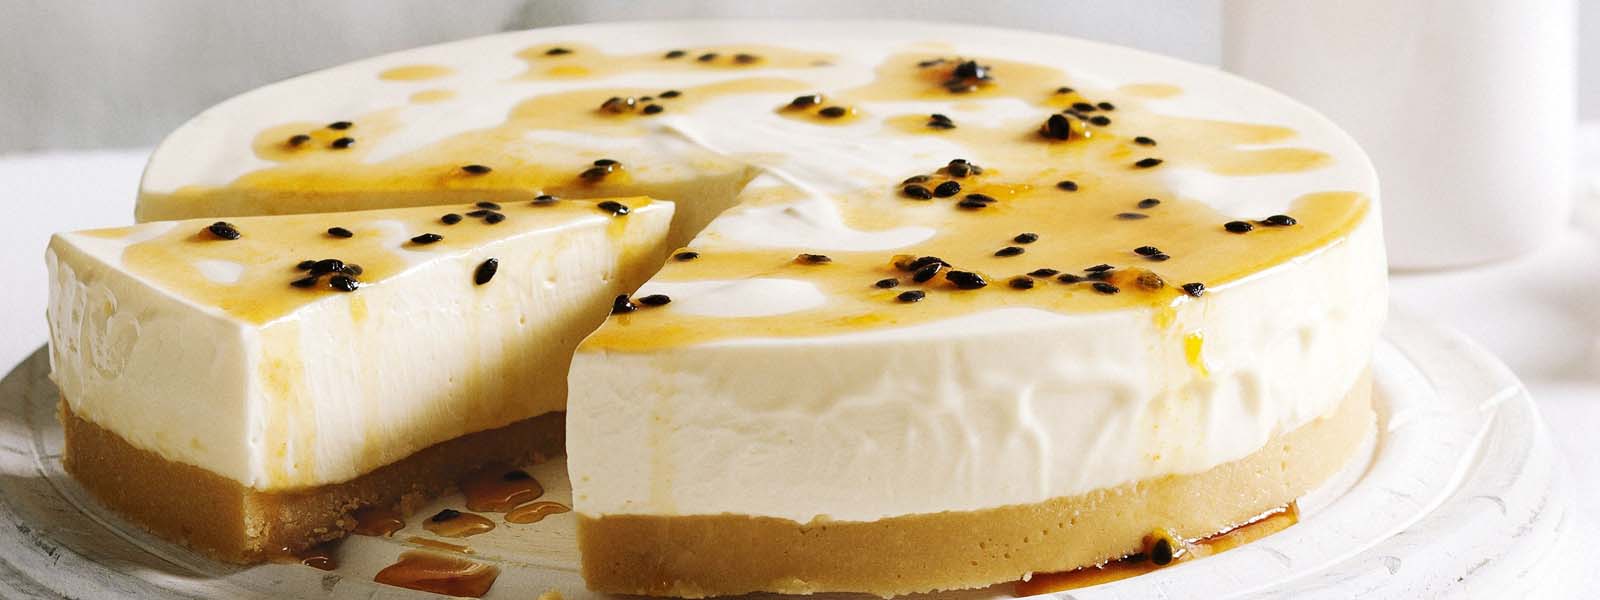
Creating the perfect white chocolate cheesecake at home represents one of baking's most rewarding achievements—a dessert that combines the elegance of classic cheesecake with the luxurious sweetness of white chocolate. This comprehensive white chocolate cheesecake recipe will guide you through creating an ultra-creamy, crack-free dessert that rivals any professional bakery creation.

Unlike traditional chocolate cheesecake, the white chocolate cheesecake offers a more delicate, sophisticated flavor profile that appeals to those who prefer subtle sweetness over bold cocoa intensity. The creamy white chocolate perfectly complements the tangy richness of cream cheese, creating a harmonious balance that makes this dessert universally appealing for special occasions and elegant gatherings.

Whether you're planning a cold cheesecake for summer entertaining or seeking an impressive biscuit cheesecake with a classic graham cracker base, mastering this technique opens doors to countless variations. From no-bake versions perfect for beginners to baked cheesecakes that showcase advanced techniques, this guide covers every method to ensure your success.

The key to perfect white chocolate cheesecake lies in understanding temperature control, proper mixing techniques, and the science behind achieving that coveted crack-free surface. With careful attention to these details and the professional tips shared here, you'll create a dessert that not only tastes exceptional but presents beautifully every single time.

Pro Tip: Want to understand the science behind perfect pastry cream that won't break or curdle? Enroll in comprehensive bakery and pastry classes that cover advanced custard techniques, chocolate work, and professional presentation methods used in top patisseries worldwide.

Understanding White Chocolate Cheesecake Fundamentals

The Science of White Chocolate Cheesecake Recipe

White chocolate cheesecake differs significantly from traditional chocolate cheesecake in both technique and flavor development. White chocolate contains cocoa butter, milk solids, and sugar but no cocoa solids, creating a different melting behavior and flavor profile that requires specific handling techniques.

Key Differences from Regular Cheesecake:

  • Temperature sensitivity: White chocolate melts at lower temperatures than dark chocolate
  • Texture impact: Creates a silkier, more luxurious mouthfeel
  • Sweetness level: Higher sugar content requires balance with tangy elements
  • Color considerations: Maintains pale, elegant appearance throughout

Cheesecake Biscuit Base Options

The foundation of any great biscuit cheesecake starts with the crust selection:

Graham Cracker Crust (Traditional):

  • Classic flavor that complements white chocolate
  • Easy to prepare and consistently reliable
  • Provides perfect textural contrast to creamy filling

Digestive Biscuit Base:

  • Popular in European-style preparations
  • Slightly less sweet than graham crackers
  • Creates more sophisticated flavor profile

Chocolate Cookie Crust:

  • Oreo cookies create beautiful color contrast
  • Adds chocolate element without overwhelming white chocolate
  • Perfect for those who want both chocolate flavors

Essential Ingredients for White Chocolate Cheesecake Recipe

Quality Ingredient Selection

Cream Cheese Foundation:

  • Full-fat cream cheese (32 oz/900g): Never use low-fat varieties
  • Room temperature: Critical for smooth mixing
  • Brand consistency: Philadelphia or similar premium brands work best
  • Fresh dating: Check expiration dates for optimal texture

White Chocolate Requirements:

  • High-quality white chocolate (8 oz/225g): Avoid white chips or compound chocolate
  • Cocoa butter content: Look for 20% or higher cocoa butter
  • Premium brands: Ghirardelli, Lindt, or Valrhona produce superior results
  • Proper storage: Keep in cool, dry place to prevent bloom

Supporting Ingredients:

  • Large eggs (3-4): Room temperature for proper incorporation
  • Granulated sugar (¾ cup): Pure cane sugar preferred
  • Heavy cream (½ cup): For melting chocolate and added richness
  • Vanilla extract (2 tsp): Pure vanilla, never imitation
  • Sour cream (½ cup): Adds tang and improves texture

Cheesecake Biscuit Base Components

Graham Cracker Crust:

  • Graham crackers (1½ cups crumbs): About 10-12 full crackers
  • Unsalted butter (⅓ cup): Melted and slightly cooled
  • Sugar (2 tbsp): Enhances sweetness and binding
  • Salt (pinch): Balances flavors

Equipment Essentials:

  • 9-inch springform pan: Non-stick coating preferred
  • Electric mixer: Stand mixer ideal, hand mixer acceptable
  • Double boiler setup: For gentle chocolate melting
  • Rubber spatulas: For gentle folding and scraping

Step-by-Step White Chocolate Cheesecake Recipe

Phase 1: Preparing the Biscuit Cheesecake Base

Step 1: Crust Creation

  1. Preheat oven: 350°F (175°C) for pre-baking crust
  2. Process crackers: Use food processor for uniform crumbs
  3. Add butter: Mix melted butter until mixture holds together
  4. Press into pan: Use flat-bottomed measuring cup for even surface
  5. Pre-bake: 8-10 minutes until lightly golden
  6. Cool completely: Room temperature before adding filling

Professional Crust Tips:

  • Proper moisture: Crust should clump when squeezed
  • Even distribution: Pay special attention to corners
  • Thickness consistency: About ¼ inch thick throughout
  • Cool before filling: Prevents melting of cheesecake mixture

Phase 2: White Chocolate Preparation

Step 2: Melting White Chocolate

  1. Chop finely: Uniform pieces melt more evenly
  2. Double boiler method: Gentle heat prevents seizing
  3. Stir constantly: Smooth melting without overheating
  4. Cool slightly: Allow to cool but remain liquid
  5. Test temperature: Should be warm, not hot (about 100°F)

Critical Chocolate Handling:

  • Avoid water contact: Even tiny amounts cause seizing
  • Low heat only: White chocolate burns easily
  • Remove from heat early: Residual heat continues melting
  • Immediate cooling: Prevents overheating and graininess

Phase 3: Creating the Cold Cheesecake Filling

Step 3: Mixing Technique

  1. Room temperature cream cheese: Beat until completely smooth (3-4 minutes)
  2. Add sugar gradually: Incorporate slowly to prevent lumps
  3. Mix thoroughly: Ensure no sugar granules remain
  4. Add eggs one at a time: Beat just until incorporated
  5. Incorporate vanilla: Mix briefly but completely

Step 4: White Chocolate Integration

  1. Cool chocolate check: Should be warm, not hot
  2. Stream gradually: Add while mixer runs on low
  3. Scrape bowl frequently: Ensure complete incorporation
  4. Add sour cream: Final ingredient for tang and texture
  5. Final mixing: Just until smooth, avoid overbeating

Professional Mixing Tips:

  • Low speed only: High speed incorporates too much air
  • Room temperature ingredients: Ensures smooth blending
  • Scrape bowl walls: Prevents unmixed pockets
  • Check consistency: Should be silky smooth without lumps

Baking Techniques for Crack-Free Results

Water Bath (Bain-Marie) Method

Step 5: Setting Up Water Bath

  1. Wrap pan: Double-wrap springform pan with heavy-duty foil
  2. Check for leaks: Ensure complete seal around bottom and sides
  3. Place in roasting pan: Large enough to accommodate water
  4. Add hot water: Fill halfway up sides of cheesecake pan
  5. Careful placement: Avoid splashing water into cheesecake

Benefits of Water Bath:

  • Even temperature: Prevents edges from cooking faster than center
  • Humidity control: Steam prevents surface cracking
  • Gentle heat: Reduces risk of curdling or separation
  • Professional results: Restaurant-quality texture and appearance

Baking and Cooling Process

Step 6: Baking Protocol

  1. Initial temperature: 325°F (160°C) for even cooking
  2. Baking time: 55-65 minutes depending on size
  3. Doneness test: Center should be almost set with slight jiggle
  4. Oven cooling: Turn off heat, crack door open
  5. Gradual cooling: Leave in oven 1 hour before removing

Step 7: Cooling Sequence

  1. Remove from water bath: Lift out carefully when cool enough to handle
  2. Room temperature: Cool completely on wire rack (2-3 hours)
  3. Refrigerate overnight: Minimum 6 hours, preferably 12-24
  4. Remove from pan: Run knife around edges before releasing

Crack Prevention Strategies:

  • Gradual temperature changes: Never shock with extreme temperature shifts
  • Proper doneness: Slight jiggle in center when done
  • Slow cooling: Extended cooling prevents rapid contraction
  • Humidity maintenance: Water bath provides necessary moisture

Cold Cheesecake: No-Bake Version

No-Bake White Chocolate Cheesecake Alternative

For those preferring a cold cheesecake approach or avoiding oven baking:

Modified Ingredient List:

  • Gelatin powder (1 packet): For setting without baking
  • Hot water (¼ cup): To dissolve gelatin
  • Heavy cream (1 cup): Whipped for lightness
  • Same base ingredients: Cream cheese, white chocolate, sugar

No-Bake Preparation:

  1. Dissolve gelatin: Sprinkle over hot water, stir until clear
  2. Cool gelatin: Allow to cool but remain liquid
  3. Whip cream: To soft peaks, set aside
  4. Mix filling: Combine cream cheese, melted chocolate, sugar
  5. Add gelatin: Stream in while mixing on low
  6. Fold in cream: Gentle incorporation for light texture
  7. Set in refrigerator: Minimum 4 hours, preferably overnight

No-Bake Advantages:

  • Summer-friendly: No oven heating required
  • Beginner-friendly: Less technical than baked version
  • Lighter texture: Whipped cream creates airier consistency
  • Faster preparation: No baking or extended cooling time

Flavor Variations and Enhancements

Chocolate Cheesecake Swirl Variation

Create beautiful contrast by swirling dark chocolate into your white chocolate cheesecake:

Chocolate Swirl Addition:

  • Dark chocolate (2 oz): Melted and cooled
  • Reserved filling (1 cup): Set aside before adding white chocolate
  • Swirl technique: Drop spoonfuls and create marble pattern

Fruit Enhancement Options

Berry Compote Topping:

  • Mixed berries (2 cups): Fresh or frozen
  • Sugar (¼ cup): Adjust to berry sweetness
  • Lemon juice (1 tbsp): Brightens flavors
  • Cornstarch (1 tsp): For thickening

Citrus Zest Integration:

  • Lemon zest: Adds brightness to rich white chocolate
  • Orange zest: Complements white chocolate beautifully
  • Lime zest: Unexpected but delicious combination

Professional Presentation and Service

Elegant Garnishing Techniques

White Chocolate Decorations:

  • Chocolate shavings: Use vegetable peeler on room temperature chocolate
  • Curls and spirals: Create with chocolate at proper temperature
  • Molded decorations: Use silicone molds for uniform shapes
  • Dusted patterns: Cocoa powder through stencils

Fresh Element Additions:

  • Berry arrangements: Fresh berries provide color contrast
  • Mint garnish: Fresh mint adds aromatic element
  • Edible flowers: Pansies or violas for elegant finishing
  • Gold leaf: Ultimate luxury presentation

Slicing and Serving Techniques

Professional Slicing:

  • Knife preparation: Use sharp, thin-bladed knife
  • Warm blade: Dip in warm water between cuts
  • Clean cuts: Wipe blade clean after each slice
  • Consistent portions: Use guide for uniform serving sizes

Service Considerations:

  • Temperature: Serve slightly chilled, not ice-cold
  • Portion size: Rich dessert requires smaller servings
  • Accompaniments: Fresh berries or light sauce complements richness
  • Timing: Remove from refrigerator 15 minutes before serving

Storage and Make-Ahead Strategies

Optimal Storage Methods

Short-term Storage (1-3 days):

  • Refrigerate covered: Plastic wrap directly on surface
  • Airtight container: Prevents absorption of other flavors
  • Stable temperature: Avoid temperature fluctuations
  • Proper positioning: Keep level to maintain appearance

Long-term Storage (Up to 1 week):

  • Wrap thoroughly: Multiple layers of plastic wrap
  • Aluminum foil outer layer: Additional protection
  • Label clearly: Date and contents for reference
  • Freezer option: Up to 2 months if properly wrapped

Make-Ahead Timeline

3 Days Before:

  • Prepare and bake cheesecake
  • Cool and refrigerate properly
  • Allows flavors to fully develop

Day of Service:

  • Add final garnishes
  • Slice just before serving
  • Allow slight warming for optimal texture

Troubleshooting Common Issues

Crack Prevention and Repair

If Cracks Appear:

  • Surface cracks: Cover with sour cream topping
  • Deep cracks: Fill with matching cheesecake mixture
  • Prevention: Focus on gradual cooling and proper baking time
  • Disguise methods: Strategic garnishing can hide minor flaws

Texture Problems:

  • Grainy texture: Usually from overheating white chocolate
  • Dense consistency: Often from overbeating or cold ingredients
  • Curdled appearance: Temperature shock or overmixing
  • Solutions: Start over with proper technique

Chocolate Cheesecake Price Considerations

Cost-Effective Strategies:

  • Buy in bulk: Purchase ingredients during sales
  • Quality balance: Invest in good chocolate, economize elsewhere
  • Seasonal timing: Take advantage of holiday sales
  • Yield optimization: One cheesecake serves 12-16 people generously

Premium Version Costs:

  • Artisanal ingredients: Premium white chocolate and organic dairy
  • Specialty additions: Fresh berries, exotic flavors
  • Professional presentation: High-end garnishes and serving ware
  • Value proposition: Homemade quality exceeds commercial alternatives

Advanced Techniques and Variations

Individual White Chocolate Cheesecake Portions

Mini Cheesecake Benefits:

  • Portion control: Perfect individual servings
  • Faster cooking: Reduced baking time
  • Party-friendly: Easy serving for large groups
  • Variety options: Multiple flavors in one batch

Preparation Adaptations:

  • Muffin tin method: Use standard or mini muffin pans
  • Liner consideration: Paper liners for easy removal
  • Adjusted timing: 18-25 minutes depending on size
  • Cooling protocol: Same gradual cooling principles apply

Professional-Level Finishing

Mirror Glaze Application:

  • Gelatin-based glaze: Creates restaurant-quality finish
  • Temperature precision: Apply at exactly 90°F for best results
  • Color options: White chocolate glaze maintains color theme
  • Professional appearance: Elevates presentation dramatically

Nutritional Considerations

White Chocolate Cheesecake Nutrition Facts

Per Serving (1/12 of recipe):

  • Calories: 420-480
  • Fat: 32-38g
  • Carbohydrates: 28-32g
  • Protein: 8-10g
  • Sugar: 25-28g

Healthier Adaptations

Reduced-Fat Options:

  • Neufchâtel cheese: Lower-fat cream cheese alternative
  • Greek yogurt addition: Replace some sour cream
  • Reduced sugar: Use sugar substitutes carefully
  • Portion control: Smaller slices extend servings

Dietary Modifications:

  • Gluten-free crust: Use gluten-free cookies for base
  • Sugar-free version: Appropriate sugar substitutes for diabetic needs
  • Lighter texture: Increase proportion of whipped elements

Conclusion

Creating the perfect white chocolate cheesecake at home represents a wonderful blend of technique, patience, and quality ingredients. This elegant dessert showcases the sophisticated sweetness of white chocolate while maintaining the classic appeal that makes cheesecake universally loved. Whether you choose the traditional baked method or the convenient cold cheesecake approach, following proper techniques ensures success every time.

The key to exceptional white chocolate cheesecake recipe results lies in attention to detail—from selecting premium white chocolate to maintaining proper temperatures throughout the process. The crack-free, ultra-creamy texture that defines professional-quality cheesecake is entirely achievable in home kitchens when you understand the science behind the techniques.

Remember that mastering biscuit cheesecake fundamentals provides the foundation for countless variations and personal creativity. From seasonal fruit toppings to elegant chocolate decorations, your homemade white chocolate cheesecake can be customized for any occasion while maintaining its sophisticated appeal.

The investment in quality ingredients and careful technique pays dividends in both taste and presentation. When you consider the chocolate cheesecake price at premium bakeries, creating restaurant-quality results at home becomes not only rewarding but economically sensible. Share your creation with confidence, knowing you've mastered one of the most beloved and impressive desserts in the baking world.

CHEF ADITYAN SINHA BISWAS

Author: CHEF ADITYAN SINHA BISWAS

Bakery & Pastry Instructor

FAQ on How to Make White Chocolate Cheesecake at Home (No Cracks, Ultra Creamy!)

Plus sign icon for expanding content. Minus sign icon for collapsing content.

How do I prevent cracks in a white chocolate cheesecake?

Prevent cracks by baking the cheesecake in a water bath, avoiding overmixing, and letting it cool gradually. Do not overbake; slight jiggle in the center means it’s perfectly done.

Plus sign icon for expanding content. Minus sign icon for collapsing content.

What type of white chocolate works best for cheesecake?

High-quality baking white chocolate or couverture chocolate works best, as it melts smoothly and adds creamy sweetness. Avoid compound chocolate with added oils, as it can affect both texture and flavor.

Plus sign icon for expanding content. Minus sign icon for collapsing content.

Can I make a no-bake white chocolate cheesecake?

Yes, you can. Melted white chocolate and whipped cream stabilize the filling without baking. It’s chilled until set, making it an easier, faster version while still rich, creamy, and indulgent.

Plus sign icon for expanding content. Minus sign icon for collapsing content.

How do I make the cheesecake ultra creamy?

Use room-temperature cream cheese, heavy cream, and melted white chocolate. Avoid overbeating the batter. A water bath and slow cooling enhance creaminess, ensuring a silky, melt-in-the-mouth cheesecake texture.

Plus sign icon for expanding content. Minus sign icon for collapsing content.

How should I store homemade white chocolate cheesecake?

Store cheesecake in the refrigerator, covered, for up to five days. For longer storage, freeze slices in airtight containers, thaw overnight in the fridge, and enjoy the same creamy texture.

Recipe Features

Recipe Categories

Recipe Tags

Recipe
Connect With Tedco Education Whatsapp

Click one of our representatives below to chat on WhatsApp or send us an email to

info@tedcoeducation.com

X
Customer service icon for support inquiries.

Counselor

Bakery and Pastry Courses

Customer service icon for support inquiries.

Counselor

Culinary Arts Courses

Click one of our representatives below to chat on WhatsApp or send us an email to

info@tedcoeducation.com

Customer service icon for support inquiries.

Counselor

Bakery and Pastry Courses

Customer service icon for support inquiries.

Counselor

Culinary Arts Courses

Connect With Tedco Education